0. 前置き
前に掲載した Web API を SPA (Single Page Application) から駆動します。
SPA は TypeScript (Next.js) で作成します。
Next.js で SPA を作成したら画面部品を Google MUI (Material User Interface) へ変更します。
開発環境は Windows のセルフ環境で AlmaLinux をサーバとして動作させます。
Teraterm で WSL2 の AlmaLinux へログインができるようにしておいてください。
各アクションにおけるプロセスの構造
この構造の理解を初心者に求めるのは酷かもしれない…。
Web ブラウザ (Windows) Linux (WSL2) イベント発生源 UI エンジン データ ネット I/O サーバ 処理言語 1 ユーザ ブラウザ Web コア →
←3000/TCP Next.js TypeScript
(本稿でコーディングするのはここ)2 JavaScript
(コードは Next.js により生成される)→
←8000/TCP Web API / ログイン
(Uvicorn + FastAPI)Python
(「Web API の作成」を参照)3 →
←8000/TCP Web API / 戦績取得
(Uvicorn + FastAPI)4 →
←8000/TCP Web API / じゃんけん
(Uvicorn + FastAPI)5 →
←8000/TCP Web API / ログアウト
(Uvicorn + FastAPI)
注意:
本稿は同一ホストでポートの異なるサービスを立てています。これを HTTPS 通信に対応させる場合、前段に HTTPS のリバースプロキシを設けてください。
また、最近の Web ブラウザでは HTTPS コンテンツの中から HTTP をアクセスすることがセキュリティ上、禁止されています。
このため HTTPS で Next.js を動作させる場合は、呼び出される Web API も HTTPS で用意する必要があります。
(呼び出される Web API を https に対応させ、呼び出し側も fetch("https://…") とする)
1. WSL2 を起動して Teraterm で接続する。
終了するときは Teraterm の中から pkill sleep を実行する。
− □ × >_ Windows PowerShell × + | ∨
*1 172.31.55.38 は WSL2 に AlmaLinux をインストールしたときのアドレス。
2. Node.js のインストール
コマンドは Teraterm の画面から操作する。
2-1. NVM (Node Version Manager) をダウンロードする。
• https://github.com/nvm-sh/nvm/releases/latest から Source code (tar.gz) をダウンロードする。2-2. NVM のインストーラを実行する。
[who@pc ~]$ wget https://github.com/nvm-sh/nvm/archive/refs/tags/v0.40.5.tar.gz
(今回のバージョンは v0.40.5 だった)
[who@pc ~]$ tar xzf v0.40.5.tar.gz nvm-0.40.5/install.sh2-3. Node.js をインストールする。
[who@pc ~]$ bash ./nvm-0.40.5/install.sh
[who@pc ~]$ . ~/.bashrc
[who@pc ~]$ echo $NVM_DIR
[who@pc ~]$ nvm --version
/home/who/.nvm
0.40.5
[who@pc ~]$ nvm install --lts
[who@pc ~]$ node -v ; npm -v
[who@pc ~]$ npm view next version
(新バージョンがあるようだが、今回は無視する)
3. Next.js アプリケーションの作成
3-1. サンプルアプリケーションを作成する。
[who@pc ~]$3-2. サンプルアプリケーションを実行する。npx -y create-next-app@latest ./my-app/ \ --ts --eslint --tailwind --no-src-dir \ --app --import-alias "@/*"
[who@pc ~]$npm view next version ./my-app/
[who@pc ~]$
16.2.9 LANG=C tree ./my-app/ | wc -l
[who@pc ~]$
22170 ip a | grep global | grep eth0
[who@pc ~]$
vim ./my-app/next.config.ts
*2ここで指定するのは上記 *1 で確認した IP アドレス。ワイルドカードも使用可能。('172.31.*.*' のような)
import type { NextConfig } from "next"; const nextConfig: NextConfig = { /* config options here */ allowedDevOrigins: ['172.31.55.38'] // <-- この行を追加する*2//, output: 'export'// Web サーバ用*3 }; export default nextConfig;
*3サーバとして Next.js を使用しない本番リリース用。npm run build で ./my-app/out/ が作成される。
開発時にはコメントアウトしておくのが吉。
[who@pc ~]$npm run dev --prefix ./my-app/
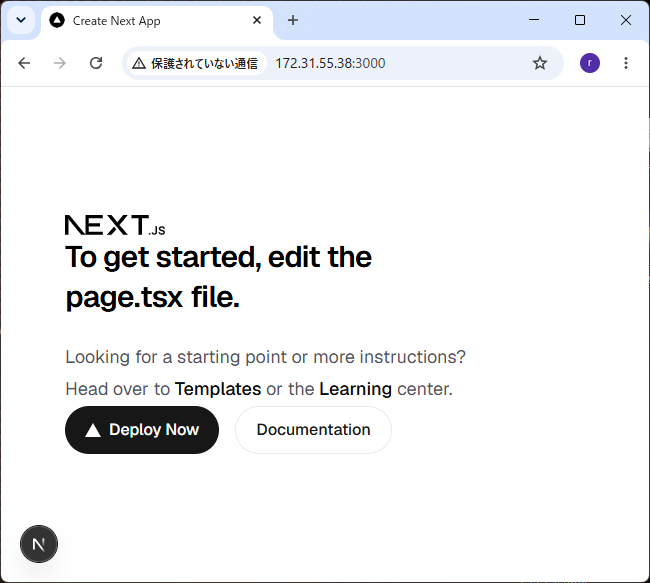
ブラウザで表示を確認したら、サンプルアプリケーションを停止すること。
◯ Compiling / ... GET / 200 in 1478ms (next.js: 967ms, application-code: 511ms)停止させるには を入力する
(後述のアプリケーションと同じポート番号を使用しているため)
4. VS Code を接続
4-1. VS Code をインストールする。
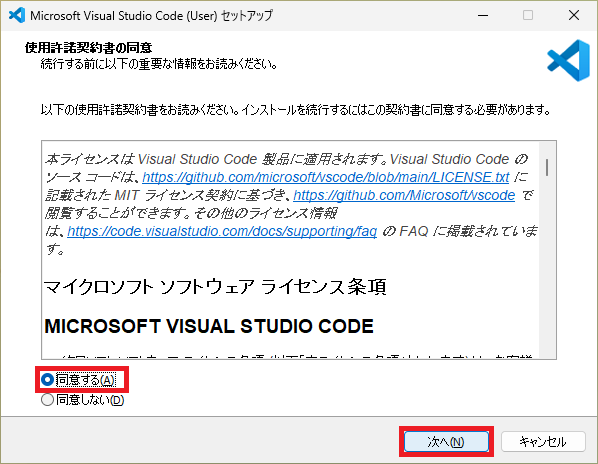
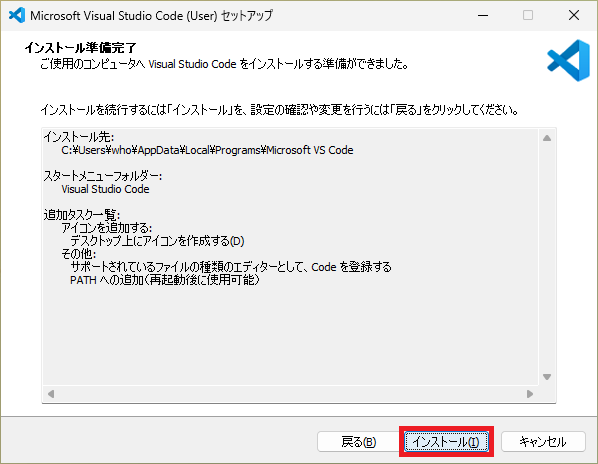
VS Code の Web ページから Windows 10,11 をクリックしインストーラをダウンロード&インストールする。4-2. VS Code に拡張機能をインストールする。
今回は VSCodeUserSetup-x64-1.116.0.exe だった。
◉同意する(A) を選択して ボタンをクリックする。
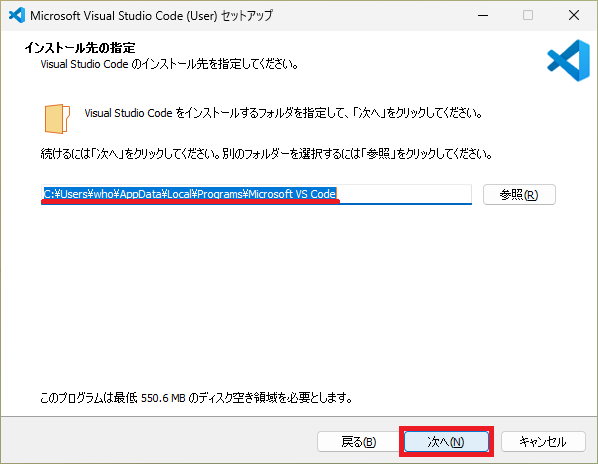
⇓
インストールするフォルダを確認して ボタンをクリックする。
⇓
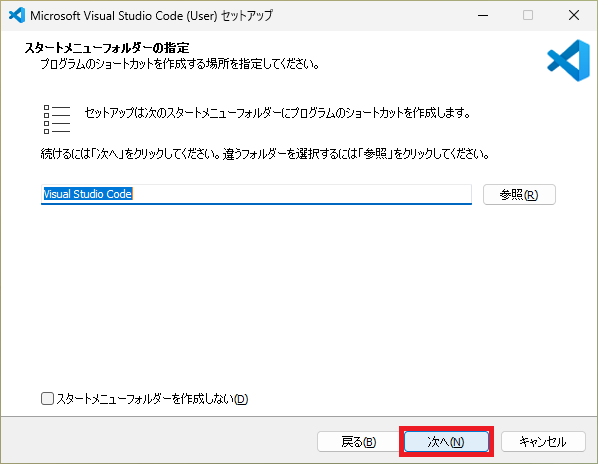
ボタンをクリックする。
⇓
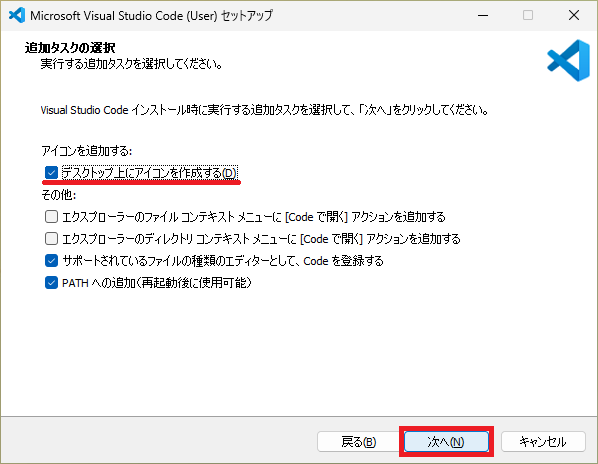
☑ デスクトップ上にアイコンを作成する(D)
にチェックを入れて ボタンをクリックする。
⇓
ボタンをクリックする。
⇓
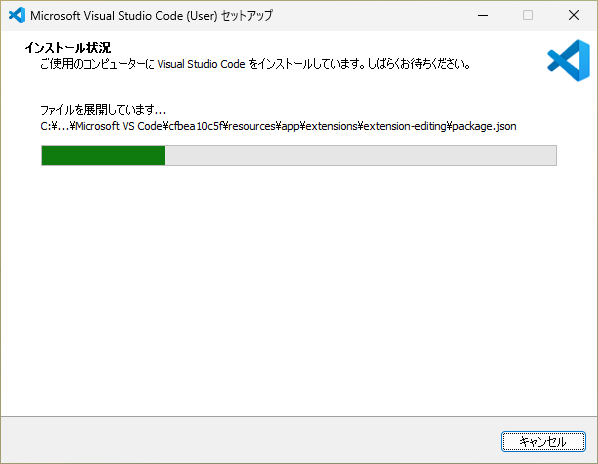
待つ。
⇓
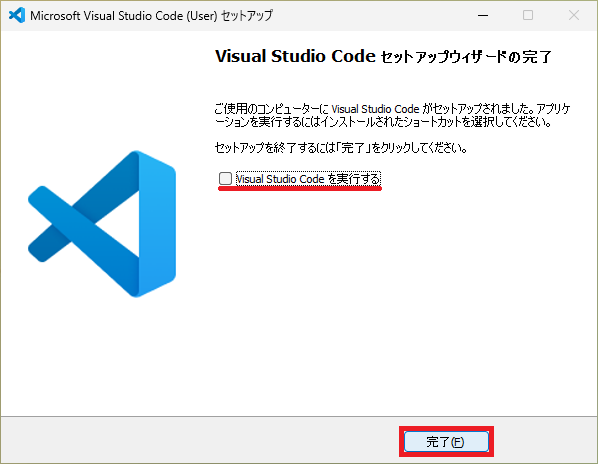
☐ Visual Studio Code を実行する
のチェックを外して ボタンをクリックする。
• 上記 4-1 でインストールした VS Code を起動し、拡張機能をインストールする。4-3. Next.js サーバ (AlmaLinux-9) への接続構成を作成する。
• 拡張機能をインストールする。← ダブルクリックで起動する
メニューが英語のままなら、以下の操作を実施する。
VS Code: メニュー > 表示(V) > 拡張機能 (Ctrl+Shift+X)
検索: Remote - SSH →
VS Code: メニュー > 表示(V) > コマンド パレット... (Ctrl+Shift+P)4-5. Next.js サーバへ接続する。
検索: Remote-SSH 選択 → 選択 → 記入 → ssh -p 22 who@172.31.55.38 選択 → 選択 →
VS Code: メニュー > 表示(V) > コマンド パレット... (Ctrl+Shift+P)
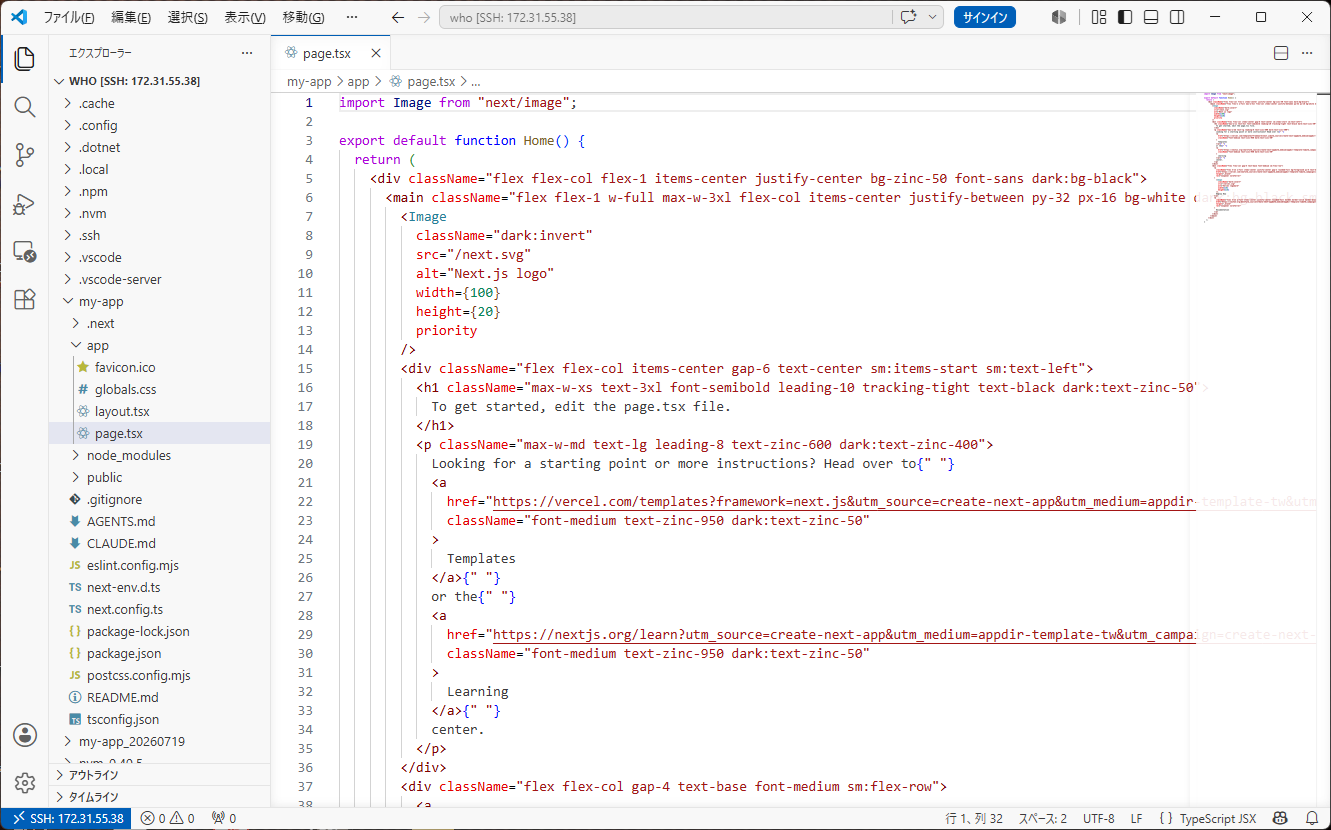
• 接続後の画面 (ここでは page.tsx を表示している)
検索: Remote-SSH 選択 → 選択 → 切断はこちら 検索: Remote: Close 選択 →
5. VS Code から Next.js を起動
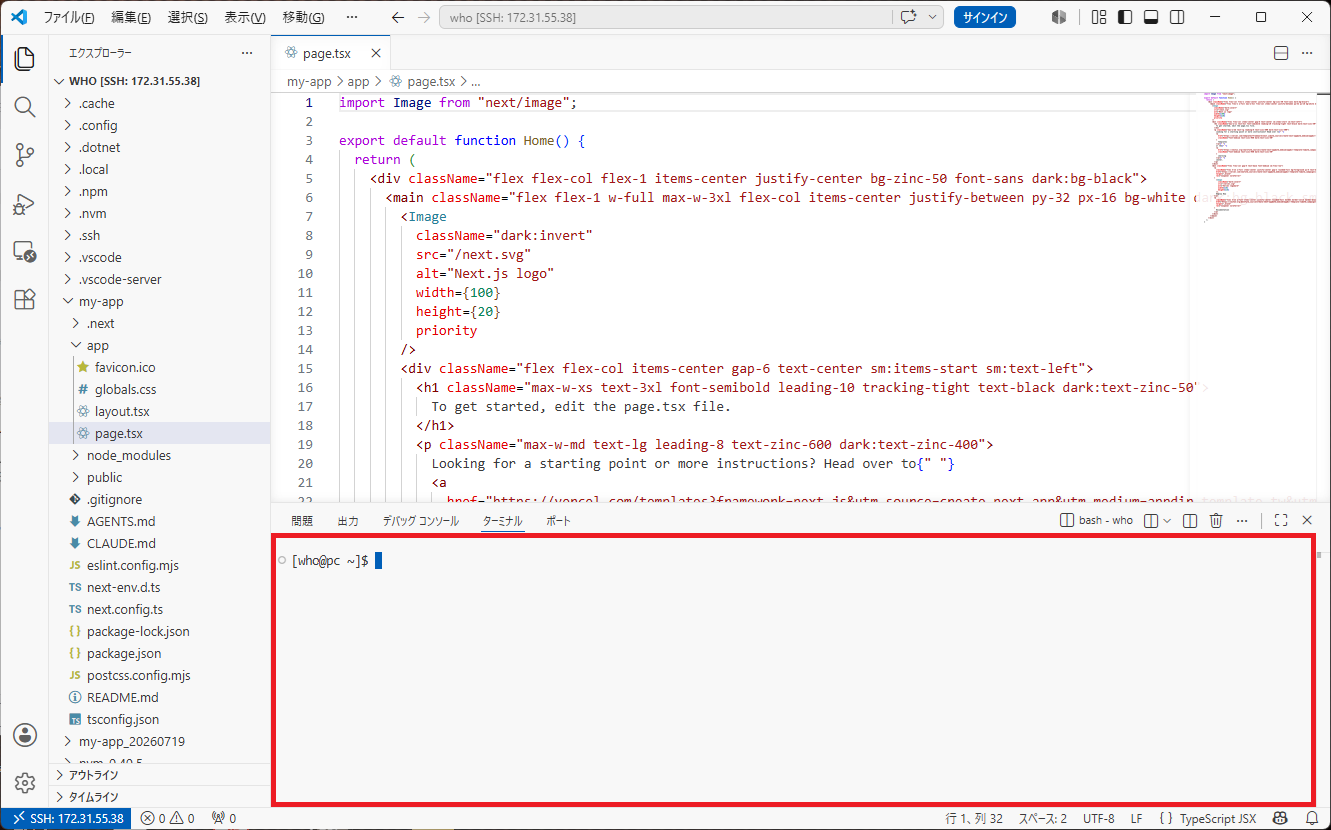
5-1. VS Code からターミナルを開く。
VS Code: メニュー > 表示(V) > ターミナル (Ctrl+@)5-2. VS Code のターミナルから Next.js を起動する。
5-3. デバッグトリガの用意⇓
○[admin@nextjs ~]$ npm run dev --prefix ./my-app/ ⏎

> my-app@0.1.0 dev
> next dev

▲ Next.js 16.2.4 (Turbopack)
- Local:         http://localhost:3000
- Network:       http://10.0.3.24:3000
✓Ready in 774ms

 GET / 200 in 493ms (next.js: 267ms, application-code: 226ms)
    停止させるには  を入力する
Web ブラウザで http://172.31.55.38:3000/ を表示する。
Next.js を起動するウィンドウを変更しただけなので、表示結果は上記 3-2 と同じ。
VS Code で page.tsx を保存 () すると Next.js の Fast Refresh 機能により、実行画面に自動反映される。
自動保存を ON にすると、手動で をせずに自動反映させることもできる。
→ VS Code: メニュー > ファイル(F) > ✓自動保存
VS Code のターミナルで操作する。
[who@pc ~]$ mkdir -p ~/.vscode/
[who@pc ~]$ cat > ~/.vscode/launch.json << EOFEOF
{
  "version": "0.2.0",
  "configurations": [
    {
      "name": "Next.js debug",
      "type": "chrome", // Chrome を起動する*4
      "request": "launch",
      "url": "http://localhost:3000",
      "webRoot": "\${workspaceFolder}"
    }
  ]
}
これは VS Code でデバッグを開始 () したときに参照される設定。
自動的に Chrome が起動し http://localhost:3000 を表示する。
*4これ以外も指定可能だが、VS Code でブレークポイントを設定可能なのは Chrome だけ。(派生である Edge も可能)
6. Google MUI の組み込み
6-1. 上記 3 で作成した Next.js のサンプルアプリケーションに Google MUI を組み込む。
[who@pc ~]$6-2. 動作確認する。npm install --prefix=./my-app/ \ next@latest react@latest react-dom@latest \ @mui/material @emotion/react @emotion/styled @mui/material-nextjs
*5問題になりそうな脆弱性があるらしいが、今は無視する。
[who@pc ~]$ npm run dev --prefix ./my-app/
7. じゃんけん SPA の作成
7-1. Web API を操作するモジュールを作成する。
画面操作のプログラムと同じファイルに記述しても構わないが、7-2. 画面操作モジュールを作成する。
TypeScript はプログラムコードが長くなりがちでメンテナンス性が劣悪になる。
これを回避するため Web API 操作モジュールを別ファイルで用意する。
< ./my-app/app/janken.tsx >
interface LoginParams { ev: SubmitEvent; userId: string; password: string; setError: (msg: string) => void; setLogInUser: (user: string | null) => void; setSessionId: (id: string | null) => void; } // ログイン処理 export const login = async ({ ev, userId, password, setError, setLogInUser, setSessionId, }: LoginParams) => { ev.preventDefault(); // Submit の画面更新を抑止する setError(""); try { // Web API の login を呼び出す const res = await fetch("http://localhost:8000/api/login", { method: "POST", headers: { "Content-Type": "application/json" }, body: JSON.stringify({ userid: userId, password: password }), }); const data = await res.json(); if (!res.ok || data.status === "error") { throw new Error(data.description || "ログインに失敗しました"); } setLogInUser(data.username); setSessionId(data.session_id); // セッション ID を呼び出し元に返戻 return data.session_id; } catch (err: any) { setError(err.message || "通信エラーが発生しました"); return null; } };
interface LogoutParams { sessionId: string | null; setLogInUser: (user: string | null) => void; setSessionId: (id: string | null) => void; } // ログアウト処理 export const logout = async ({ sessionId, // セッション ID setLogInUser, // ユーザ ID の useState setSessionId, // セッション ID の useState }: LogoutParams) => { // セッション ID が無ければ何もしない if (! sessionId) return; try { // Web API の logout を呼び出す await fetch("http://localhost:8000/api/logout", { method: "POST", headers: { "Session-Id": sessionId }, // セッションIDをヘッダーでAPIへ渡す }); } catch (err) { console.error("ログアウトAPIの呼び出しに失敗しました:", err); } finally { // 画面をログアウト状態に戻す setLogInUser(null); setSessionId(null); } };
interface JankenParams { sessionId: string | null; hand: string; setError: (msg: string) => void; setLogInUser: (user: string | null) => void; setSessionId: (id: string | null) => void; } // じゃんけん処理 export const ken = async ({ sessionId, hand, setError, setLogInUser, setSessionId, }: JankenParams) => { setError(""); if (!sessionId) { setError("セッション ID がありません。"); return null; } try { const res = await fetch("http://localhost:8000/api/janken", { method: "POST", headers: { "Content-Type": "application/json", "Session-Id": sessionId, }, body: JSON.stringify({ hand: hand }), }); if (res.status === 401) { setLogInUser(null); setSessionId(null); throw new Error("セッションの有効期限が切れました。再度ログインしてください。"); } const data = await res.json(); if (!res.ok || data.status === "error") { throw new Error(data.detail || data.description || "じゃんけんに失敗しました"); } return data; } catch (err: any) { setError(err.message || "通信エラーが発生しました"); return null; } };
interface SummaryParams { sessionId: string | null; setError: (msg: string) => void; setLogInUser: (user: string | null) => void; setSessionId: (id: string | null) => void; } // 戦績の取得処理 export const summary = async ({ sessionId, setError, setLogInUser, setSessionId, }: SummaryParams) => { // セッション ID が無ければ何もしない if (!sessionId) return null; try { const res = await fetch("http://localhost:8000/api/summary", { method: "POST", headers: { "Session-Id": sessionId }, }); if (res.status === 401) { setLogInUser(null); setSessionId(null); throw new Error("セッションの有効期限が切れました。再度ログインしてください。"); } const data = await res.json(); if (!res.ok) { throw new Error(data.detail || "戦績の取得に失敗しました");} return data; // {'win': X, 'lose': Y, 'draw': Z} を返戻する } catch (err: any) { setError(err.message || "通信エラーが発生しました"); return null; } };
ユーザ画面 (UI: User Interface) のプログラムを作成する。
ボタン等の部品は Node.js の標準的な構成とする。
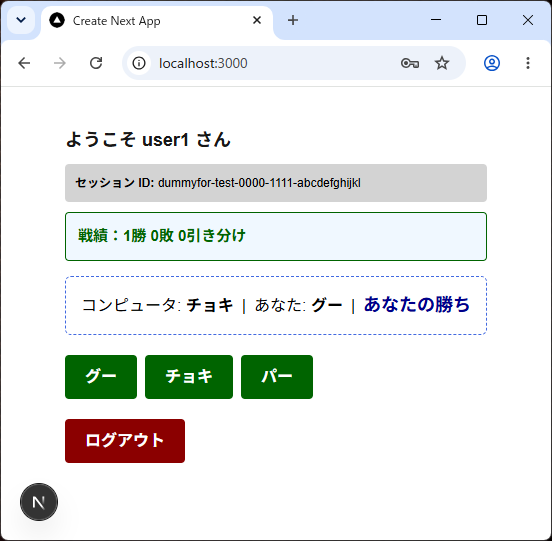
< ./my-app/app/page.tsx > (従来版)
'use client'; import { useState, useEffect } from 'react'; import * as jan from './janken';
// スタイル定義 const boxStyle = { display: 'block', width: '100%', maxWidth: '300px', padding: '8px', marginTop: '5px', marginBottom: '15px', border: '2px solid silver', borderRadius: '4px', backgroundColor: 'white', color: 'black', fontSize: '16px' }; const buttonLogin = { padding: '10px 20px', backgroundColor: 'royalblue', color: 'white', border: 'none', borderRadius: '4px', cursor: 'pointer', fontWeight: 'bold', fontSize: '16px', marginTop: '10px' }; const buttonLogout = { padding: '10px 20px', backgroundColor: 'darkred', color: 'white', border: 'none', borderRadius: '4px', cursor: 'pointer', fontWeight: 'bold', fontSize: '16px', marginTop: '10px' }; const buttonHand = { padding: '10px 20px', backgroundColor: 'darkGreen', color: 'white', border: 'none', borderRadius: '4px', cursor: 'pointer', fontWeight: 'bold', fontSize: '16px', marginTop: '10px' };
const translateRslt: Record<string, string> = { Win: 'あなたの勝ち', Lose: 'あなたの負け', Draw: '引き分け' }; const translateHand: Record<string, string> = { Rock: 'グー', Scissors: 'チョキ', Paper: 'パー' };
export default function mainPage() { const [userId, setUserId] = useState(''); const [password, setPassword] = useState(''); const [error, setError] = useState(''); const [logInUser, setLogInUser] = useState<string | null>(null); const [sessionId, setSessionId] = useState<string | null>(null); const [lastGame, setLastGame] = useState<{ user: string; cpu: string; result: string } | null>(null); const [summary, setSummary] = useState<{ win: number; lose: number; draw: number } | null>(null);
// クライアント側のマウント完了を検知するフラグ (ハイドレーションエラーの防止) const [isMounted, setIsMounted] = useState(false); useEffect(() => { setIsMounted(true); }, []);
// ログイン処理 const handleLogin = async (ev: React.SyntheticEvent) => { ev.preventDefault(); // フォームのデフォルト挙動を抑止 // janken.tsx の login() を実行する const sessionId = await jan.login({ ev: ev as any, // SubmitEvent 型に適合させるキャスト userId, password, setError, setLogInUser, setSessionId }); if (sessionId) { // 戦績をリクエストする const scoreSummary = await jan.summary({ sessionId: sessionId, setError, setLogInUser, setSessionId }); if (scoreSummary) { const win = scoreSummary.win; // 勝ち数 const lose = scoreSummary.lose; // 負け数 const draw = scoreSummary.draw; // 引き分け数 setSummary({win: win, lose: lose, draw: draw}); } } };
// ログアウト処理 const handleLogout = () => { // janken.tsx の logout() を実行する jan.logout({ sessionId, setLogInUser, setSessionId }); setLastGame(null); // ログアウト時に結果を消去 setSummary(null); // 戦績も消去 };
// じゃんけん処理 const janken = async (hand: string) => { // janken.tsx の ken() を実行する const jankenResult = await jan.ken({ sessionId, hand, setError, setLogInUser, setSessionId }); if (jankenResult) { // 今回の結果を State に保存 setLastGame({ user: translateHand[hand], cpu: translateHand[jankenResult.cpu_hand], result: translateRslt[jankenResult.result]}); // 戦績を取得 const scoreSummary = await jan.summary({ sessionId: sessionId, setError, setLogInUser, setSessionId }); if (scoreSummary) { const win = scoreSummary.win; // 勝ち数 const lose = scoreSummary.lose; // 負け数 const draw = scoreSummary.draw; // 引き分け数 setSummary({win: win, lose: lose, draw: draw}); } } };
// 準備ができるまでレンダリングをスキップ (ハイドレーションミスマッチを防止) if (! isMounted) return null;
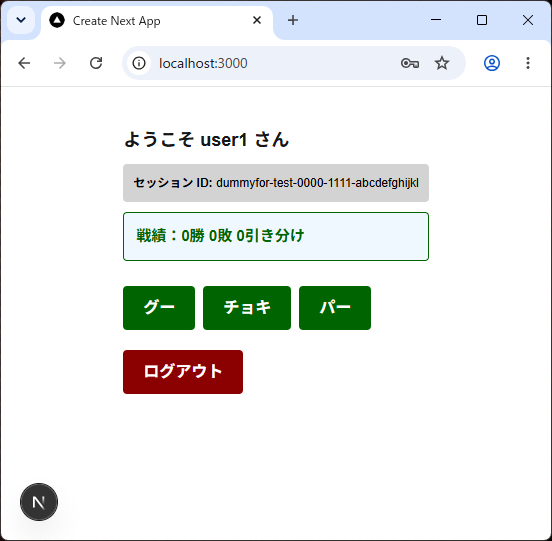
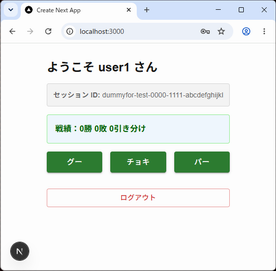
// ログイン後の画面 if (logInUser) { return ( <div style={{ padding: '40px', maxWidth: '600px', margin: '0 auto' }}> <p style={{ fontSize: '18px', fontWeight: 'bold' }}> ようこそ {logInUser} さん </p> {/* セッション ID を表示 */} <div style={{ margin: '10px 0', padding: '10px', backgroundColor: 'lightgray', borderRadius: '4px', wordBreak: 'break-all', color: 'black', fontSize: '12px' }}> <strong>セッション ID:</strong> {sessionId} </div> {/* 通算戦績を表示 */} {summary && ( <div style={{ padding: '12px', backgroundColor: 'aliceblue', border: '1px solid darkgreen', borderRadius: '4px', marginBottom: '15px', color: 'darkgreen', fontSize: '15px' }}> <strong> 戦績:{summary.win}勝 {summary.lose}敗 {summary.draw}引き分け </strong> </div> )} {/* 今回の勝敗結果 */} {lastGame && ( <div style={{ padding: '15px', backgroundColor: 'white', color: 'black', border: '1px dashed royalblue', borderRadius: '6px', marginBottom: '10px', }}> <span style={{ margin: '0 0 5px 0' }}> コンピュータ: <strong>{lastGame.cpu}</strong> </span> | <span style={{ margin: '0 0 10px 0' }}> あなた: <strong>{lastGame.user}</strong> </span> | <span style={{ margin: '0', fontSize: '18px', fontWeight: 'bold', color: 'darkblue' }}> {lastGame.result} </span> </div> )} {/* じゃんけんボタン */} <div style={{ margin: '10px 0' }}> <button style={buttonHand} onClick={() => janken('Rock')}> グー </button>  <button style={buttonHand} onClick={() => janken('Scissors')}> チョキ </button>  <button style={buttonHand} onClick={() => janken('Paper')}> パー </button> </div> {/* ログアウトボタン */} <button style={buttonLogout} onClick={handleLogout}> ログアウト </button> </div> ); }
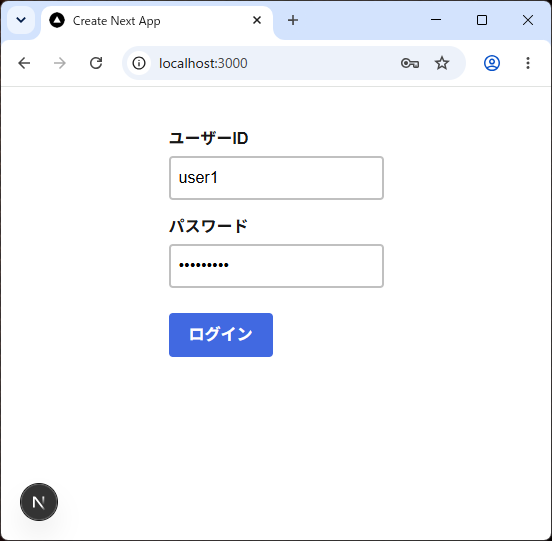
// ログイン前の画面 (ここがスタート画面) return ( <div style={{ padding: '40px', maxWidth: '400px', margin: '0 auto' }}> <form onSubmit={handleLogin}> {error && <p style={{ color: 'red', fontWeight: 'bold' }}> {error} </p>} <div> <label style={{ fontWeight: 'bold' }}>ユーザーID</label> <input type="text" value={userId} onChange={(ev) => setUserId(ev.target.value)} required style={boxStyle} /> </div> <div> <label style={{ fontWeight: 'bold' }}>パスワード</label> <input type="password" value={password} onChange={(ev) => setPassword(ev.target.value)} required style={boxStyle} /> </div> <button type="submit" style={buttonLogin}> ログイン </button> </form> </div> ); }
8. 動作確認
8-1. Web API を起動する。
コマンドは Teraterm の画面から操作する。8-2. 動作確認をする
*6VS Code のターミナルから実行しない理由
• Web API の開発に VS Code を必要としない。
• 画面を圧迫し、本来の Node.js のデバッグの邪魔になる。
Web API は、前に記述した jankenapi.py を利用する。
[who@pc ~]$ uvicorn jankenapi:app --host 0.0.0.0 --port 8000
INFO: Started server process [2255] INFO: Waiting for application startup. Janken API を起動します。 INFO: Application startup complete. INFO: Uvicorn running on http://0.0.0.0:8000 (Press CTRL+C to quit)
INFO: 127.0.0.1:38108 - "POST /api/login HTTP/1.1" 200 OK INFO: 127.0.0.1:38108 - "POST /api/summary HTTP/1.1" 200 OK INFO: 127.0.0.1:38108 - "POST /api/janken HTTP/1.1" 200 OK INFO: 127.0.0.1:38108 - "POST /api/summary HTTP/1.1" 200 OK中断するには を入力する
INFO: Shutting down INFO: Waiting for application shutdown. Janken API を終了します。 INFO: Application shutdown complete. INFO: Finished server process [2255]
VS Code からデバッグを起動し、Web ブラウザを表示する。
VS Code: メニュー > 実行(R) > デバッグの開始 を選択する。*7
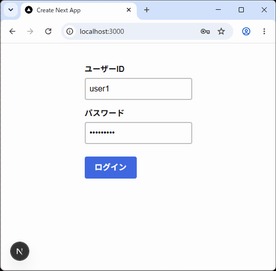
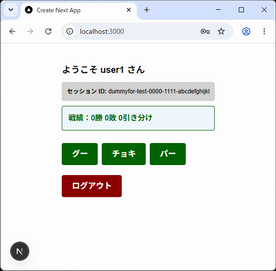
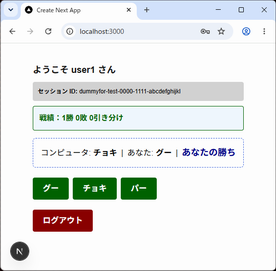
*7VS Code から「デバッグの開始 」を操作することによって Web ブラウザが自動的に起動する。
このとき Next.js サーバと VS Code の間に 127.0.0.1 とのトンネルが作成される。
このためブラウザの URL が localhost になる。
9. Google MUI のページを作成
9-1. page.tsx の内容を変更する。
変更しない箇所はグレーアウトの記述にしている。9-2. 動作確認をする。
< ./my-app/app/page.tsx > (Google MUI 版)
'use client'; import { useState, useEffect } from 'react'; import * as jan from './janken'; import { Box, Button, TextField, Typography, Card, CardContent, Divider } from '@mui/material';
const translateRslt: Record<string, string> = { Win: 'あなたの勝ち', Lose: 'あなたの負け', Draw: '引き分け' }; const translateHand: Record<string, string> = { Rock: 'グー', Scissors: 'チョキ', Paper: 'パー' };
export default function mainPage() { const [userId, setUserId] = useState(''); const [password, setPassword] = useState(''); const [error, setError] = useState(''); const [logInUser, setLogInUser] = useState<string | null>(null); const [sessionId, setSessionId] = useState<string | null>(null); const [lastGame, setLastGame] = useState<{ user: string; cpu: string; result: string } | null>(null); const [summary, setSummary] = useState<{ win: number; lose: number; draw: number } | null>(null);
// クライアント側のマウント完了を検知するフラグ (ハイドレーションエラーの防止) const [isMounted, setIsMounted] = useState(false); useEffect(() => { setIsMounted(true); }, []);
// ログイン処理 const handleLogin = async (ev: React.SyntheticEvent) => { ev.preventDefault(); // フォームのデフォルト挙動を抑止 // janken.tsx の login() を実行する const sessionId = await jan.login({ ev: ev as any, // SubmitEvent 型に適合させるキャスト userId, password, setError, setLogInUser, setSessionId }); if (sessionId) { // 戦績をリクエストする const scoreSummary = await jan.summary({ sessionId: sessionId, setError, setLogInUser, setSessionId }); if (scoreSummary) { const win = scoreSummary.win; // 勝ち数 const lose = scoreSummary.lose; // 負け数 const draw = scoreSummary.draw; // 引き分け数 setSummary({win: win, lose: lose, draw: draw}); } } };
// ログアウト処理 const handleLogout = () => { // janken.tsx の logout() を実行する jan.logout({ sessionId, setLogInUser, setSessionId }); setLastGame(null); // ログアウト時に結果を消去 setSummary(null); // 戦績も消去 };
// じゃんけん処理 const janken = async (hand: string) => { // janken.tsx の ken() を実行する const jankenResult = await jan.ken({ sessionId, hand, setError, setLogInUser, setSessionId }); if (jankenResult) { // 今回の結果を State に保存 setLastGame({ user: translateHand[hand], cpu: translateHand[jankenResult.cpu_hand], result: translateRslt[jankenResult.result] }); // 戦績を取得 const scoreSummary = await jan.summary({ sessionId: sessionId, setError, setLogInUser, setSessionId }); if (scoreSummary) { const win = scoreSummary.win; // 勝ち数 const lose = scoreSummary.lose; // 負け数 const draw = scoreSummary.draw; // 引き分け数 setSummary({win: win, lose: lose, draw: draw}); } } };
// 準備ができるまでレンダリングをスキップ (ハイドレーションミスマッチを防止) if (! isMounted) return null;
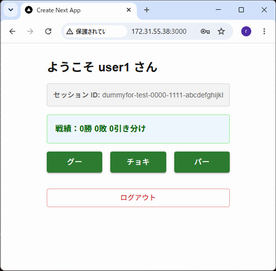
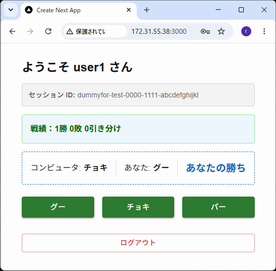
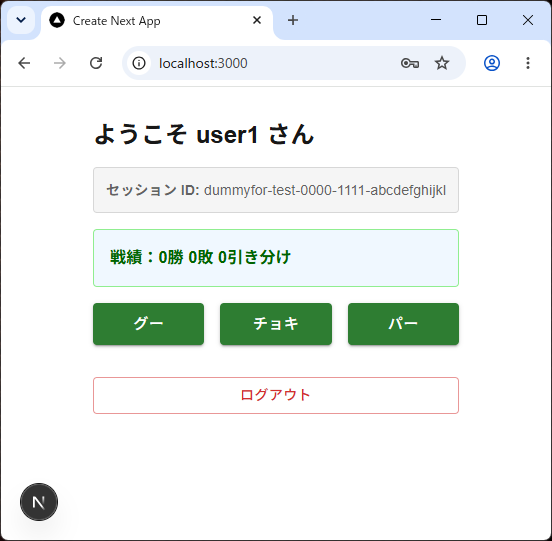
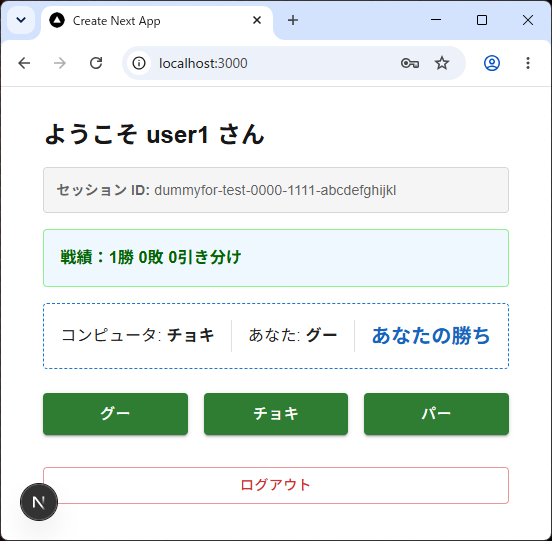
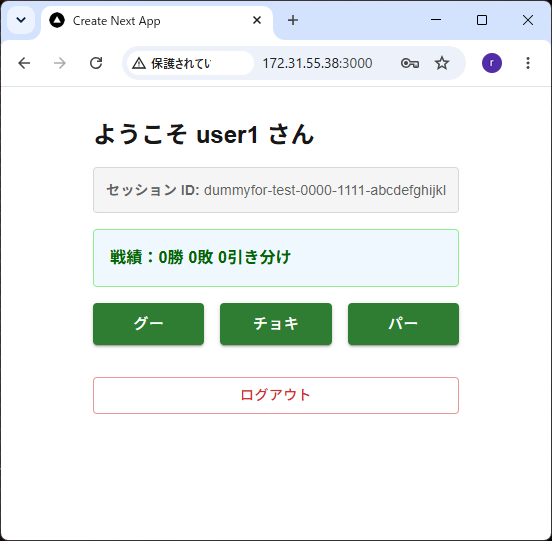
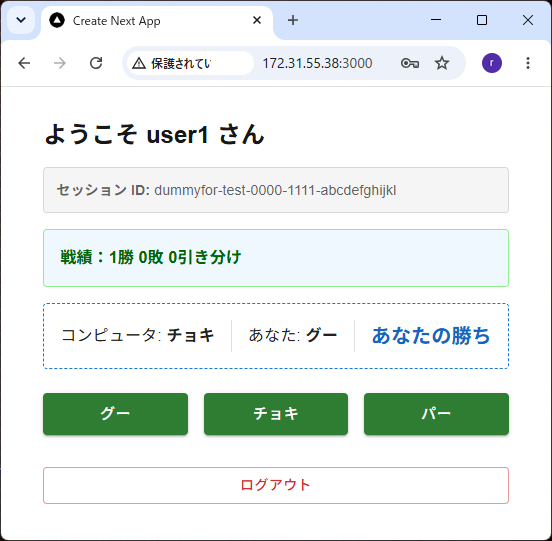
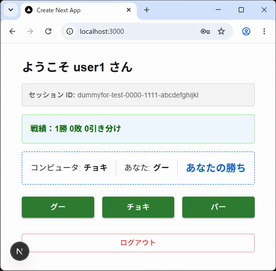
// じゃんけんボタンの共通項をまとめておく const buttonJanken = { variant: 'contained' as const, color: 'success' as const, size: 'large' as const, fullWidth: true, }; // ログイン後の画面 if (logInUser) { return ( <Box sx={{ p: 4, maxWidth: 600, mx: 'auto' }}> <Typography variant="h5" component="h2" sx={{ fontWeight: 'bold', mb: 2 }}> ようこそ {logInUser} さん </Typography> {/* セッション ID を表示 */} <Card variant="outlined" sx={{ bgcolor: 'grey.100', mb: 2 }}> <CardContent sx={{ p: '12px !important', '&:last-child': { pb: '12px !important' } }}> <Typography variant="body2" sx={{ wordBreak: 'break-all', color: 'text.secondary' }}> <strong>セッション ID:</strong> {sessionId} </Typography> </CardContent> </Card> {/* 通算戦績を表示 */} {summary && ( <Box sx={{ p: 2, bgcolor: 'aliceblue', border: '1px solid lightgreen', borderRadius: 1, mb: 2, color: 'darkgreen' }}> <Typography variant="body1" sx={{ fontWeight: 'bold' }}> 戦績:{summary.win}勝 {summary.lose}敗 {summary.draw}引き分け </Typography> </Box> )} {/* 今回の勝敗結果 */} {lastGame && ( <Card variant="outlined" sx={{ borderStyle: 'dashed', borderColor: 'primary.main', mb: 3, p: 2 }}> <Box sx={{ display: 'flex', flexDirection: 'row', gap: 2, justifyContent: 'center', alignItems: 'center' }}> <Typography variant="body1"> コンピュータ: <strong>{lastGame.cpu}</strong> </Typography> <Divider orientation="vertical" flexItem /> <Typography variant="body1"> あなた: <strong>{lastGame.user}</strong> </Typography> <Divider orientation="vertical" flexItem /> <Typography variant="h6" sx={{ fontWeight: 'bold', color: 'primary.dark' }}> {lastGame.result} </Typography> </Box> </Card> )} {/* じゃんけんボタン */} <Box sx={{ display: 'flex', flexDirection: 'row', gap: 2, mb: 4 }}> <Button {...buttonJanken} onClick={() => janken('Rock')}>グー</Button> <Button {...buttonJanken} onClick={() => janken('Scissors')}>チョキ</Button> <Button {...buttonJanken} onClick={() => janken('Paper')}>パー</Button> </Box> {/* ログアウトボタン */} <Button variant="outlined" color="error" fullWidth onClick={handleLogout}>ログアウト </Button> </Box> ); }
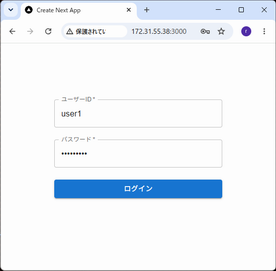
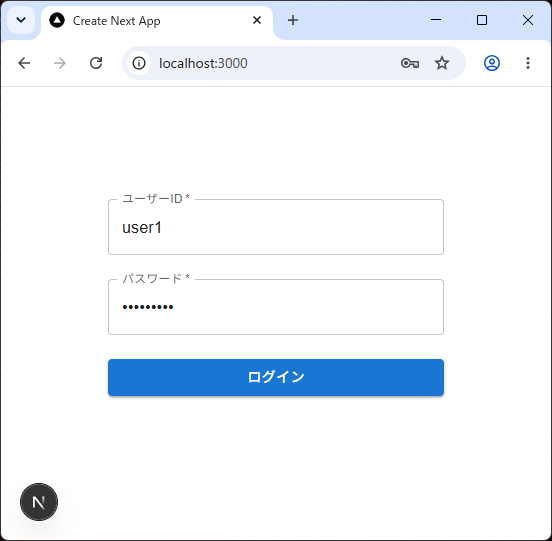
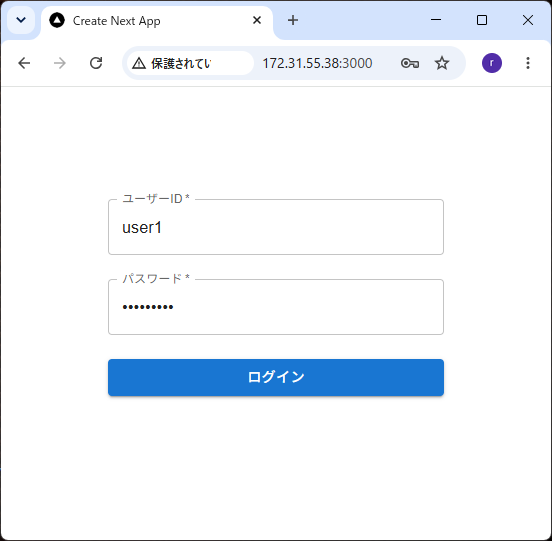
// ログイン前の画面 (ここがスタート画面) return ( <Box sx={{ p: 4, maxWidth: 400, mx: 'auto', mt: 8 }}> <form onSubmit={handleLogin}> {error && ( <Typography color="error" sx={{ fontWeight: 'bold', mb: 2 }}> {error} </Typography> )} <TextField label="ユーザーID" value={userId} fullWidth margin="normal" onChange={(ev) => setUserId(ev.target.value)} variant="outlined" required /> <TextField label="パスワード" value={password} type="password" fullWidth margin="normal" onChange={(ev) => setPassword(ev.target.value)} variant="outlined" required /> <Button type="submit" variant="contained" color="primary" fullWidth sx={{ mt: 2 }}> ログイン </Button> </form> </Box> ); }
VS Code からデバッグを起動し、Web ブラウザを表示する。(上記 8-2 と同様の操作)
VS Code: メニュー > 実行(R) > デバッグの開始 を選択する。
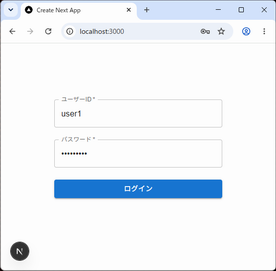
10. リリース用の実行
VS Code を使用せず、WSL2 の AlmaLinux とブラウザを操作する。
10-1. Teraterm から Next.js サーバを起動する。
[who@pc ~]$10-2. ブラウザで Next.js サーバをアクセスする。npm run build --prefix ./my-app/
[who@pc ~]$npm run start --prefix ./my-app/
ブラウザから http://172.31.55.38:3000/ を表示する